A website search bar is the most important element for our site visitors as they use it to perform their required search terms within our site search form. In my past tutorial, I mentioned 9 Responsive Search Box Widget For BlogSpot Blogs, but you need to be a bit technical to get them worked on different custom templates.
Importance of Website/Blog Internal Search Bar
In today's arena websites and Blogs are more complicated than ever before as they have an extensive collection of contents. Many contain a huge number of data which visitors can use to answer their queries and learn what they need to know before staying a long time on your website. But with all the stuff and features loaded into many of today’s websites, it can also be more exhausting for your visitors to, first of all, determine whether or not a site will contain the data they need and then find it on the website/blog. Installing a search box widget can present a vast of advantages to help your site visitors and also convenience your online function in the process.
Pay Attention: 4 Killer Horizontal Email Subscribe Widgets For BlogSpot
Installing a search box gadget can help your blog visitors to find what they need more swiftly. Website search form is certainly the fastest way for someone to find what he/she is looking for on a vast and comprehensive site/blog. A site search form helps the visitors get around navigational structures that may be consuming their time. As the sites continually adding new contents on regular basis, many users may find the website search bar to be an extremely useful technique in helping them find what they expect. If someone uses a search engine like Google, Bing, or Yahoo to reach your website, they possibly prefer the same search method for finding the existed information within your site/blog.
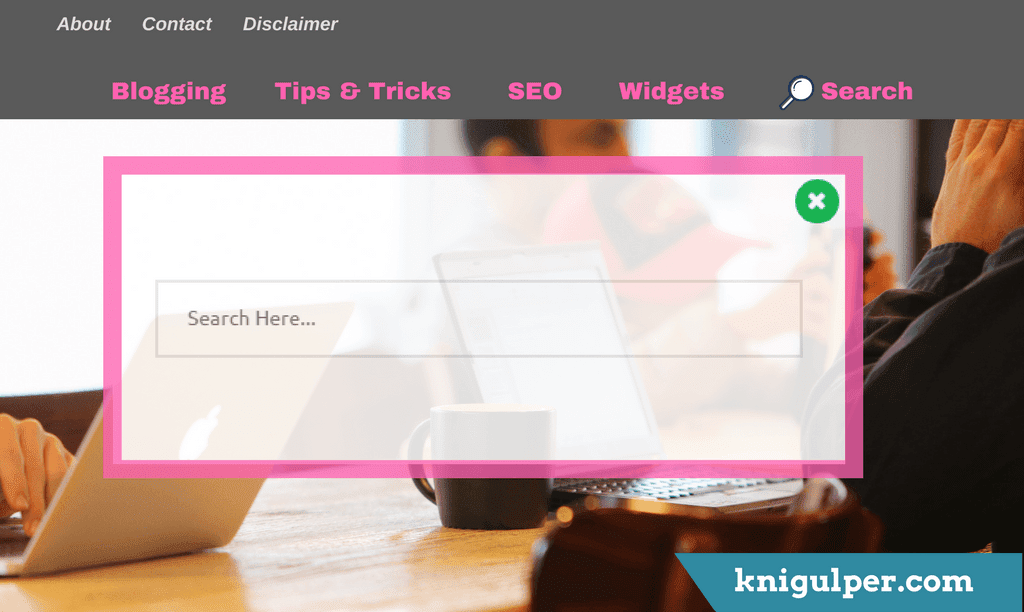
Today, I am going to share Onclick Popup Search Bar that is designed with Css3 and HTML5. No JavaScript or Jquery included. This Onclick widget works nicely as it is the lightweight, responsive, and beautiful as well. You can show this form in your main menu as shown below.

To Add Onclick Popup Search Box Widget to Blogger, Kindly Follow the Steps:
- Login to your Blogger Dashboard with your credentials
- Navigate to Theme > Edit HTML
- Click inside the Theme Editor and press Ctrl + F to open the search bar
- Type <head> and paste the given CSS3 URL just below it
- Now find the ]]></b:skin> and paste the given code right above it
- The next step is to find the </body> and paste the given code just above it
- Finally, add the Markup where you want to show the Search Widget
- After completing the above-mentioned steps, click Save Theme
<link href='//cdn.rawgit.com/knigulper/Web-Development/master/www.knigulper.com/onlicksearchbox.css' rel='stylesheet' type='text/css'/>
.modalDialog{position:fixed;top:0;right:0;bottom:0;left:0;background:rgba(0,0,0,0.6);z-index:99999;opacity:0;-webkit-transition:opacity 200ms ease-in;-moz-transition:opacity 200ms ease-in;transition:opacity 200ms ease-in;pointer-events:none} .modalDialog2{position:fixed;top:0;right:0;bottom:0;left:0;background:rgba(0,0,0,0.6);z-index:99999;opacity:0;-webkit-transition:opacity 200ms ease-in;-moz-transition:opacity 200ms ease-in;transition:opacity 200ms ease-in;pointer-events:none} .modalDialog:target{opacity:1;pointer-events:auto} .modalDialog:target > div{margin:8% auto} .modalDialog2:target{opacity:1;pointer-events:auto} .modalDialog2:target > div{margin:0 auto;padding-top: 80px;} .newsletter-sm2 h3 {color:#1abc9c;font-size: 40px; font-weight:800; text-align:center; margin-bottom: 10px;-webkit-animation: anim 2s ease-in infinite; animation: anim 2s ease-in infinite;} .newsletter-sm2 p {font-size: 16px;font-weight:600; color:#555; line-height: 20px;margin:0} .newsletter-sm2 p span {background: #16a085; color: #fff; padding: 4px 8px; border-radius: 3px;} .modalDialog > div{-webkit-transition:all 100ms ease-in;-moz-transition:all 100ms ease-in;transition:all 100ms ease-in;width:500px;position:relative;margin:5% auto;background:#fff;min-height:200px} .modalDialog2 > div{-webkit-transition:all 100ms ease-in;-moz-transition:all 100ms ease-in;transition:all 100ms ease-in;width:100%;position:relative;margin:0 auto;background:#fff;height:100%;}
<div id='search-bar'> <form action='/search' id='search-form' method='get'> <input id='sq' name='q' placeholder='Search Here...' type='text' value=''/> </form> </div> </div> </div></div></div>
<li><a href='#search'><i class='fa fa-search'/> Search</a></li>
Pro Tip: I recommend you add the given HTML/Markup in your main menu.
If you need further assistance, please leave your comments, and I feel happy to help you out.


Speak Your Mind